Monday, December 29, 2014

Girly Burp Cloths

Just when I thought I would be done creating for the year, my daughter started a conversation about the items she wants for her baby, to be born in March. Typical me, I set aside my chores and we went to pilfer in my flannel stash.


She sorted fabric. Matched and coordinated colors. Then set aside the fabrics she preferred. As long as they were out she may as well cut them to the right size. And I may as well stitch them together.


There went my day off, LOL.

Flowers
I used some decorative stitches from my fancy shmancy Janome to run a line of stitching down the length. Easy peasy quilting.

Elephant stitches on elephant flannel
I try to coordinate my stitching to the fabric or project. It just adds to the cute factor of the project.
So I added elephant stitches to the pink elephant flannel.


I added a curly vine stitch to the swinging monkey flannel.


And a circle stitch to the polka dot flannel.

It was a lovely afternoon spent talking fabrics and babies with one of my girls. The bonus was the dozen burp cloths created.


Tuesday, December 16, 2014

Decorative stitches ... The Good and The Wonky.

I am doing some decorative stitching on some sunflower petals and it is not as easy as I thought it would be! It's a lot of shifting the quilt top and changing direction.

It's a big quilt flimsy to stuff in a small machine. 


Sometimes it looks good ....


Sometimes it looks raggedy and uneven ....


Thank goodness my daughter loves me even if my stitches are a little wonky. Just like me!

Tuesday, December 9, 2014

Finishing what I start .... soon I hope.

I must finish what I start. The Little Engine That Could .... I think I can. I think I can. I think I can. The reality is that I know I can finish the quilts I have started. It's a time issue. I am busy and I do not always manage my time well. I do NOT want to start having a backlog of UFO's. They weigh on my mind and I really don't have the storage space.

My little corner to sew in my bedroom. I am so blessed. 
I could whine about sewing in the corner of my bedroom which means I am limited on the hours I can sew - my hubby goes to bed pretty early for his 430am wake up alarm. But that's not really fair. At least I do have a small dedicated space. For years, I sewed on my dining room table for an hour or two each day. I had to put everything away to serve a meal to my husband and 4 children. It was imperfect but I made it work. I will keep my little corner working too. 

Sunflower Fields getting its border attached.
Christmas is coming and I really want to cut fabric for Bonnie Hunter's Grand Illusion mystery quilt. However I am staying on task to finish 2 quilts for my daughters. One is a gift for my daughter for Christmas or I want it to be a gift. I finished the top Friday. I need to piece the back, sandwich it then do some simple quilting. Its a chevron based quilt so I am going to quilt lines going with the chevrons. It's a king size, so it won't be quick but it won't be hard either.

Border and more border for Celtic Solstice.
The second quilt is last years mystery Celtic Solstice. The backing fabric finally arrived so as soon as I get my safety pins freed up, I will sandwich and quilt it. Again, simple lines as the design is the main attraction. Again a king sized quilt. I apparently lost my mind when I decided to make everything so big this year. 

Inner border strips for Celtic Solstice.
Do you struggle with time?
Do you finish one project before starting another?   
Officially, I do have a 3rd quilt top waiting to be finished but it is for my bed. No rush. 

I'm not deep into stitching Grand Illusion but it is on my mind daily, so I am linking up to Bonnie Hunter's Quiltville Monday Link Up. I will be playing catch up soon I hope. 

Tuesday, December 2, 2014

Grand Illusion Colors


2013 Celtic Solstice though it might be renamed by my daughter

Bonnie Hunter of Quiltville has released the first clue for her 2014 mystery quilt Grand Illusion. I'm excited and hesitant, LOL. I participated for the first time last year making Bonnie's Celtic Solstice. I kept up with the steps but then assembling the blocks got stalled out waiting on my cohort to work her scrappy magical arranging. I just finished the main flimsy. A year later! I'm delighted and proud that the bulk of the work is accomplished. And embarrassed that it took soooo long.

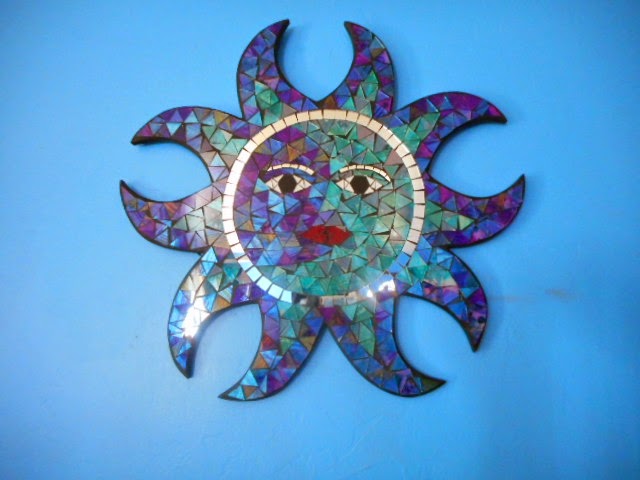
From the bright blue wall and the blues-y sun, you can tell blue is my favorite color

I also hesitated on the colors. Bonnie chose colors almost identical to what I used last year. I love them but I have other color waves in my head. Which meant I stopped sleeping because I'm loony, LOL. So finally on Thanksgiving eve I decided to follow my heart and the colors in my head.

I chose .....


Kona Mulberry for Bonnie's pink


Kona Lagoon for Bonnie's yellow


Kona Ocean for Bonnie's blue (aqua to be more precise)


Kona Clover for Bonnie's green


Kona Bahama Blue for Bonnie's neutrals


Kona Marine for Bonnie's black 

Obviously I am NOT going to have high contrast between colors. However, I hope to have a lovely rippling motion of blue - green - purple lusciousness. I tried to make substitutions based on the intensity of her colors light to dark. I'm definitely going to have to label them to avoid confusing myself. 

And now I wait for my fabrics to arrive. I ordered the Kona cottons, a couple of flannels and the backing to Celtic Solstice from Fabric dot com I can hear the clock ticking as I wait and fidget. Sighsss .... 

tick ....
tock .....
tick .....
tock ..... 

Go check out all the participating Grand Illusion quilters here


Friday, November 28, 2014

Finally working on Celtic Solstice

I am finally back to working on Bonnie Hunter's 2013 mystery quilt Celtic Solstice. It is destined for my younger daughters bed and she has been managing how the blocks go together. That meant I only work on it when she is available. Argh!!! The kid is busy with college, she got married last month, life is busy and I want this quilt done.

OK ..... I confess I have 3 quilt tops super close to being done with the piecing. 
I have issues ...... 

Anyway, she finally cleared some time, got the boxes out and started arranging blocks, which I sewed. Two days later, she arranged more blocks. I asked her to count and we were just blocks short of being done. SO CLOSE!!!


So the next day, I pushed, made her separate them by style, recount, and arrange the remaining blocks needed. Wahoooooooooooo!!!  

RIPPLES!!!! 

Todays count showed us one short, LOL. That's ok though. It took a few minutes to assemble the last block and press it. Then I started pairing the two styles of blocks together. Some are a little wonky, a little ripple-y ... I;m not worrying about it anymore. I will steam them smooth. I want this quilt top done. Tomorrow I hope to sew the pairs into 4sie's.

My daughter has these neat boxes from her work that hold quilt blocks beautifully.
I would call the blocks by name but last year as Bonnie shared her tutorials, I saved them to my computer. And backed them up on an external hard drive. Just in time for my laptop to barf and die. I bought a new laptop, my computer guy made a few alterations, then attached my external hard drive. It asked about formatting. Without pondering, he clicked for it to format ..... and it formatted all over my saved info. All of it. Oh well. So one is a 'fight' block and another a 'happy birthday' block or maybe those are the same block. One had numbers but I have no recollection of which numbers, LOL. I just know one block went by two names. 

It is time to get this flimsy whipped out. Can I hear a "Heck yeah!"

Update** I have the basic king size top done! Wahoo! Now to add borders and get this quilted.

Even without borders, the flimsy drapes over the sides of my king size bed. 

Bonnie Hunter is doing a mystery quilt again this year. Her inspiration was the Grand Hotel on Mackinac Island. It is called Grand Illusion. Go check it out on her blog Quiltville.

Monday, November 24, 2014

Blue moon

I am working on finishing up a few projects before Christmas. And then I need to make or buy Christmas. I'm behind. Meanwhile Bonnie Hunter is preparing to start this years mystery quilt. And ..... I have colors, many beautiful colors floating around in my head wanting to find a quilt pattern so I car wrap myself in them. This is in spite of the fact I have fabric bought for 2 more original quilts and they just sit, folded in bags, waiting for attention! What is wrong with me?!?


I found this sun - moon while vacationing in Branson last month. The colors reached out to me immediately. I didn't have to think about it before my hands reached for the sun.

It has the colors I am craving. Blues, purples both light and dark. Turquoise and aqua. Then it is triangles. Think of the possibilities!


Can you see the moon on the right side? You can see the paleness better in the lower picture, though the top one has less glare. My photography skills need work :)

Now to find a pattern and fabrics and more time .....


Friday, November 21, 2014

My Quilt Inspector

Everyone seems to have a quilt inspector. I have a canine quilt inspector.

Hurry Mom! I wanna go outside!


This is Isis. She came to me 2 years ago, already named. Egyptian lore says the name Isis is literally Queen of the Thrones. She was a goddess of health, marriage and wisdom. This is who her breeder was thinking about when she named her. Her sire is named Zeus. Her dam was Hera. Lots of mythology there. My girl is NOT named after the radical people creating havoc.

Early snow 11-16-14
Isis came to me when she was several months old. She was a wild child but over time has settled into my life. Farm chores are one of her favorite activities. Waiting while I stitch is not her first choice but she does flop on the bed waiting for the moment we can go for a run outside. It's tough for me to get a good picture of her as she prefers to be moving :)

Slender puppy still in early 2013

Sunday, November 16, 2014

Quilted Potholders

My oldest son asked me to make a couple of potholders for a friend of his getting married. They were decorating in an Indonesian Elephant theme. Red, gold and green. Indonesian Elephants??? I asked if this was a new fad and he shrugged his shoulders. New brides decorating their first home is not in his realm of knowledge. Typical man, LOL.

I could not find elephant print fabric. I did find some insulating batting with the foil layer which is new to me. Luckily, my stash had some red and gold patterned fabric that looked appropriate. The real blessing - my Janome has an elephant stitch on it! Yes!!


I decided to quilt the layers then trim and bind the various potholders. It was easy stitching, though the dense quilting really shrank my pieces. So I made extras.


I made a red on one side, gold on the other.


I made a red gold stripe.

Before quilting .... 

After quilting ...


I made a half square triangle style potholder.


And would you look at that elephant stitch!

Friday, November 14, 2014

Expanding Sunflower Fields

You recall the Sunflower Field quilt top I tested recently, well its time to expand it to fit a big bed. Plus I need the storage space for new projects, hehehe.


The design makes it easy to go bigger - you simply add more columns and rows of chevrons. And the solid neutral rows with the sunflowers. Soooo cut more squares. Stitch more HST's. Cut.


Press. Trim to size. 


Don't you love the pile of sliver trimmings? Something about the tiny slivers makes my heart happy. I don't like waste but I love the little piles of slivered fabric. Maybe it just shows I am accomplishing something. 


My yellows are close in tone, even though this is scrappy. More flower petals traced and cut. Flowers stitched. Now to assemble and assess the overall size since I am making this bigger than even the pattern allowed. I'm doing my typical out of the box, cut things up and mix them together quilt making. 


Monday, November 3, 2014

Bad Bobbin!


Do you ever wind a bobbin and it just goes wrong? A little bit of thread wrapped on the post rather than the bobbin and the whole bobbin ended up being lumpy. I hated to do it but I unwound the whole thing. It would just make my machine angry, so that thread will have to be set aside for hand sewing. Bad bad bobbin!

Monday, August 18, 2014

Testing Sunflower Fields


Happy August! How are you? I am so happy that summer will be over soon. I know many people who want summer to last forever - I'm the opposite, LOL. I love cool weather. I do not like hot, hot weather and in Oklahoma, it is hot for months. This summer has been fairly mild until lately so I can't complain too much. Now its nasty hot outside, so I am indoors stitching in the cool air conditioning. 

I'm not fond of trimming blocks down until I see how spiffy they look without the little tabs.

This week I actually followed some directions and tested another quilt for Quilt Doodle Doodles. She has some fun designs. This week I tested Sunflower Fields for her. My oldest daughter adores sunflowers, so this fit. And the quilt will have a home when it is done.

Trimmings from stitching half square triangles. 
Her inspiration was fields of wheat with sunflowers on the edges. I live in a rural agricultural community. By golly, we have lots of wheat fields around here. However the farmers raise winter wheat which is usually harvested around Memorial Day, if not sooner. So we never get sunflowers with our wheat. They come later during the summer heat. It all goes back to our weather, LOL.


I love the bright sunflowers

The pattern is scrappy, light and quick to stitch. I used leftover yellows and gold paired with an off white, some tan and I even tossed in some unbleached muslin. Cindy has her sunflowers on a green vine. I'm debating to add the vine or just stems and leaves. Cute and flowing or authentic to my local flowers?


The pattern is clear. The blocks will work for beginners. It's a really nice design. I feel like I got a lot of bang for my efforts, so to speak. I had a beautiful quilt top whipped out in short time. It's just so pretty!  


Wednesday, July 9, 2014

Rainbow Chair Covers


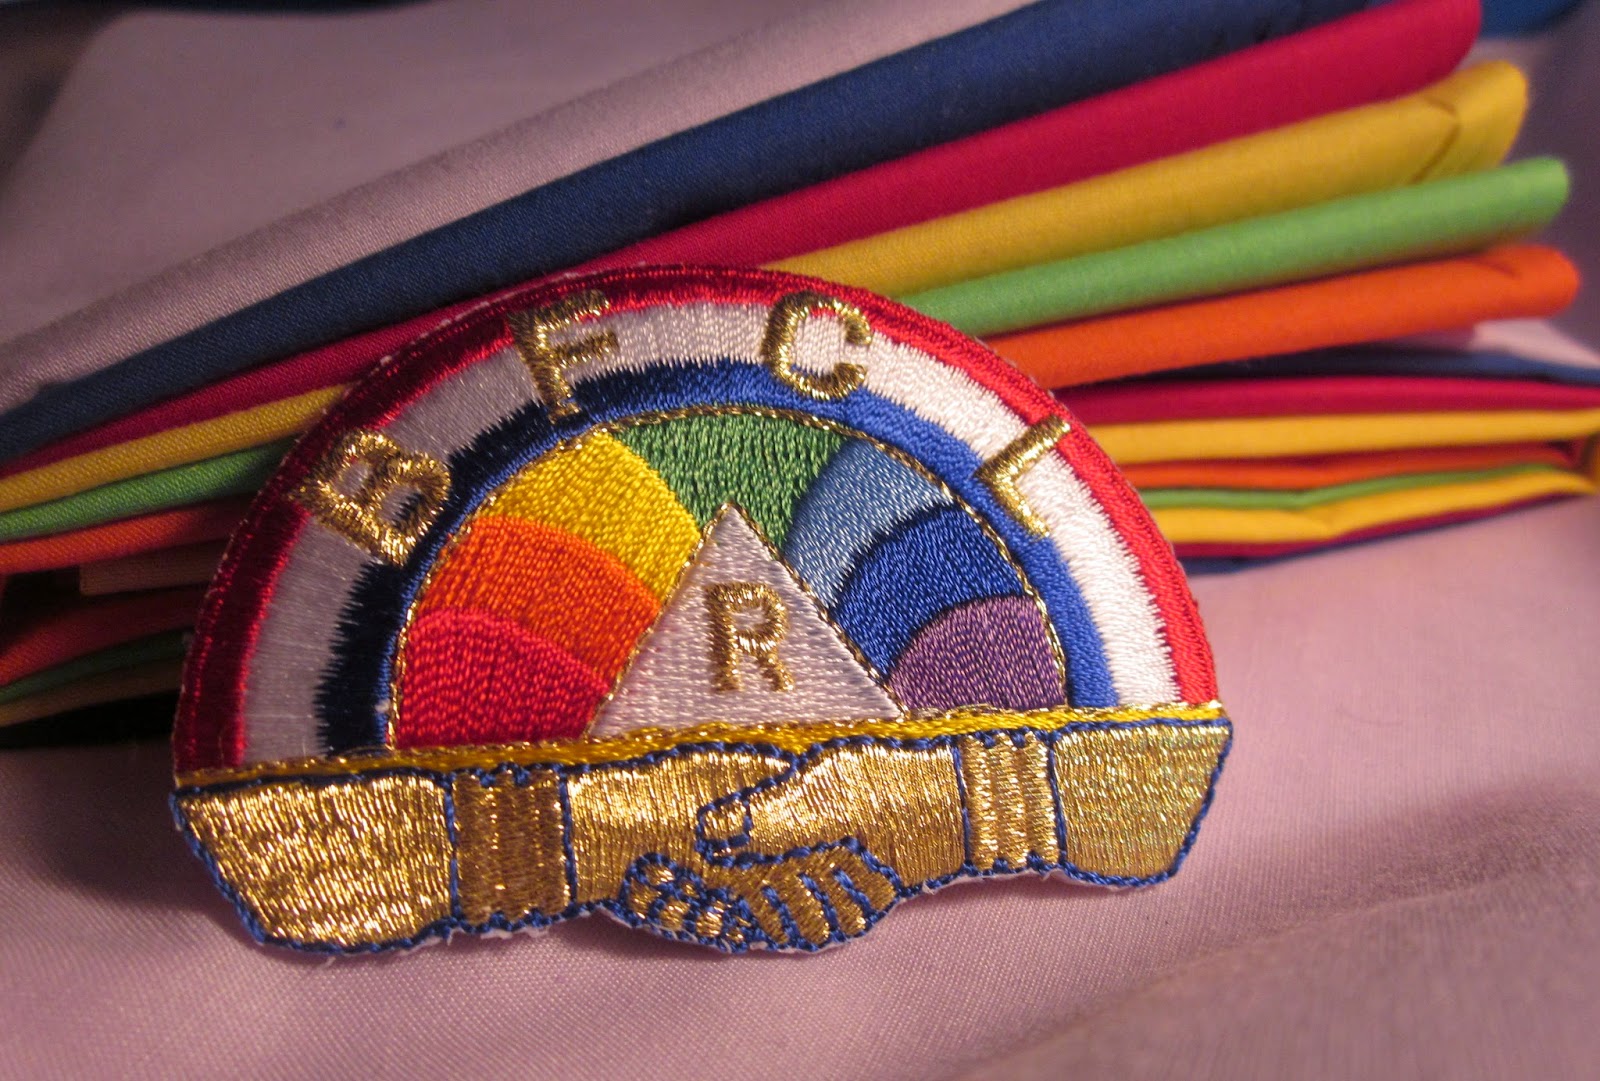
My daughter is active in The International Order of the Rainbow for Girls organization. They are a youth group under the guidance of the Masonic Fraternity. They teach lessons of service, love for home, family and community, speech and such. My oldest daughter was also in Rainbow, so we have been in this for 14 years now.
Green
We are part of a brand new assembly. The girls are actively working to grow the membership in their group. This means they need to do lots of fundraising and need 'stuff' for their assembly room. I was in the meeting a couple of weeks back and realized chair covers like they use at their big state meeting would sure spiff things up. The state uses black covers so the theme decorations get attention. In our little bland room though, covers in the colors of the Rainbow would be fantastic for events.

A bright stack - green, orange, red, yellow, indigo, violet

We went shopping and found fabric matching 6 of the 7 colors pretty quick - still on the hunt for the perfect light antique blue in cotton. I borrowed a chair to bring home and make my pattern. Why buy a pattern when I can draw my own? I laid the chair down and traced the curve at the top, because of course, we wouldn't have a squared off chair, LOL. Then I measured and pondered whether to use one long piece of fabric or two pieces to make the cover. I finally decided on two pieces, as I found Rainbow patches to sew on the covers. It will be easier to attach, pre assembly, to a smaller piece of fabric.

This is the violet chair cover
For once, I followed common sense and made a practice cover first. I used the black from a bolt I bought some time back. That bolt has come in handy so many times! I measured the chair to get the basic dimensions. Then I used my tracing to get the proper curvature. A quick seam, then the test to see how I did ... Voila! It fit! It looked pretty darn good too considering I hadn't ironed it yet. Wahoo! Success! Now to repeat it with the emblems attached to the vivid colors.

Unironed red ... I like it!
I have to admit it seemed easier cutting fabric, assembly line style. By making the cover from 2 pieces, I can make the complete cover with just one yard. I fold the fabric, selvage to selvage, make sure I have a straight edge then cut two 18 inch x WOF pieces. Then I cut one piece shorter for the face of the chair back. The other was longer for the back of the chair back. If you try this, you will have to measure your chair to see how to optimize your fabric.

Indigo needs pressed, LOL. 

I measured down 8 inches and marked the back for the placement of the emblems. I got so lucky and found that above the clasped hands is a yellow line. I threaded my machine and stitched right across there. I rethreaded my machine with bright red and stitched the curved top slowly and carefully. Wahoo!! It worked. No hand stitching for me :)

After that I match up the front and back piece and stitch the seam that goes from one side, up and over to the other. Hem the thing and its done. I must be doing something wrong because it is way too easy! Oh well. I can handle easy, hehehe. In no time at all, voila! Seven chair covers made to custom match the ribbons they already had in red, orange, yellow, green, blue, indigo and violet. Go Rainbow!

The chairs set up in the meeting room.