Saturday, June 7, 2014

Baby Burp Rags


I seem to fly from one project to the next. This one I have been squelching to surprise the intended recipient. I don't blog much but friends do pop in now and then :)

Today's project was burp rags. I have done these a few times before. The mommies always tell me how much they use them, so I keep making them when we have a pregnant friend. I started this with my niece and if I had doubts, I only had to cruise her Facebook pictures to see the burp rags in almost all of her infant sons pictures. It really warmed my heart to know I gave her something she could really use.

I have experimented with the sizes trying to find what I think fits best on a shoulder. I like these best so far. I made them longer and narrower. I try to use an even yard of flannel fabric to keep this simple and inexpensive. And absorbent of course, LOL.


I cut my yard in half (18 inches) on the length. The width of the fabric was 42 inches on one piece and 43 inches on the other. I decided 10 inches wide would be good. That gives me 8 pieces of fabric per yard. Each piece measuring 10x18 inches.


Rather than making yards and yards of binding, I put 2 pieces of flannel right sides together, add a layer of low loft batting and stitch around the edges, leaving a good 3-4 inch gap for turning inside out. I do pin them due to the thickness. I also used a walking foot to stitch through the fluff.


A quick trim of anything excess then turning them is pretty easy. I use a wooden spoon handle to poke out my corners. I don't get crazy as these are functional and soft. I don't want crispy, perfect burp rags, I want something a mother feels comfortable using.


Once they are turned, I iron the snot out of them. This may sound silly but they are too fluffy to stitch. I use my iron going back and forth, up and down, almost to the edges to get everything smoothed out. then flattened. Once I feel I have a nice flattish rectangle, I iron the edges. I could slip stitch the opening closed but its just as easy to machine stitch it. I do a simple straight stitch around the whole rag close to the edge.

We used red trucks for one side and blue trucks for the other. It's a boy! 

Then I stitch at least 2 lines of stitching down the length of the burp rag. I could do more but I want this super soft, without grooves directing the baby spit down and onto mommas clothes. On today's rags, I only did 2 lines because the pattern of the fabric is a bit busy. On some striped and plain rags in the past, I did loops, flowers, whatever tickles me.


I used 2 yards of flannel and 1 yard of batting to create 8 sturdy burp rags suitable for spitty and drooling babies. It was a good afternoon of work.


Sunday, May 25, 2014

Dolly Quilt completed!

You can see our Cardigan Corgi's and Cavalier's on the other side of the fence.
Tada! Here is the Dolly Quilt. 
She was made to compete in the Handmaids Challenge from Joy Studio. I love the She Who Sews line designed by Janet Wecker Frisch. It's creative and so much fun! 

I used a pastel variegated thread for quilting in the blocks. 

I could not find the table that goes around my machine. I think I wasted a couple of hours looking for it. It is under my nose - I just can't see it today. Oh well, I managed anyway using more decorative stitches. Not as detailed maybe but Dolly isn't fussing :) 


Completing her means I am eligible to win a lovely prize package. The great news, you can win a prize too! 3 people (not in the competition) will be chosen at random. You can enter to win a "She Who Sews" panel by going to Joy Studio and leaving a comment. 
Wahoo! We all love prizes.   


Dolly interrupted and continuing ...

What was I thinking when I said I wanted to finish the next day?!? Ack!


The minute I have a plan, God sends me down a side path, LOL. I received a message that there were 2 feral cats in the local shelter that needed picked up. We live in a rural area and have outbuildings that attract mice and rats. I NEED cats to help me keep the population in control. In exchange, I have a kitty condo in the far barn. It's 10 by 20 ft or so, with houses stuffed with hay for warmth in the winter. We put out dry food and water daily and even have a litter box so they can potty indoors when the weather is bad. They are protected from dogs and wild animals with a high door but they can come and go as they please. It's a decent gig for a wild or semi wild cat.

And yes, I do have them spayed or neutered before they go out to the barns.

Since it is Memorial Day weekend, the spay clinic is closed until Tuesday which means I had to break out cages for the fur balls. They are not friends yet, so they each have an extra large cage with food and litter box until Tuesday. Its work to clean each day but worth it to save them from being euthanized. Once they recover sufficiently from surgery, they can join our other cats in the barn. These kitties are both black - one shorthair, one longhair. We already have a gorgeous part Siamese that is completely wild - do not touch! The other is a black and white shorthair that likes petting and loves hunting. She is quite skilled and usually has a body or several each day for us. These black cats will add a sneaky factor to the nightly hunting forays.


I did get the backing pieced for the dolly quilt from a yard of burgundy paisley and some solid black. The binding will be solid black, as it will edge the yellow ruler fabric. I just love the black against the yellow. The quilt is measuring about 48 1/2 inches square. Big enough for a toddler to snuggle under on cool nights watching tv.

I laid out the backing, batting and top and proceeded to frustrate myself endlessly. I don't have a utility table set up, so I was using my nice dining room table. Argh. To avoid scratching the finish, I put my cardboard pattern laying board underneath. I couldn't really attach the backing to it or the table. So I pinned. Found the wrinkles, Unpinned and repinned. I will have a sewing room eventually and life will be easier. Until then I make do with what I have :)

Once I was mostly satisfied, I stitched in the ditch around all the blocks to secure my quilt sandwich. I do not plan on any other quilting on the ruler fabric so I went ahead and bound the quilt. I could let it go as it is but I want to do some free motion quilting around the dollies. Its good practice and will look nice.


I machine quilted my binding with a decorative 'asterick' stitch. I love decorative stitches and this looks so cute to me. Have you been fortunate to see the She Who Sews fabrics up close? I love the detail! The ruler markings are sharp and consistent. The pincushion fabric is vivid red with shading, pins and even stray threads in the design. I love them!

A peek at the backing

Have a great Memorial Day weekend!! I want to thank all military persons and their families for their sacrifices for my freedom. I appreciate all you do!  

Thursday, May 22, 2014

Dolly Quilt Top

Happy May!! What have you been sewing? Or has life and spring swept you up? I've been on a happy whirlwind with prom, my oldest daughters wedding, two younger kids wrapping up their first year of college, graduation is this week, it's endless!

The weather was gorgeous for the wedding. 

I have been sewing. I stitched 3 vests with neck ties for my daughter and son in law. I feel like I have altered, hemmed and added straps to a million formals but I'm sure it's a few less.

Click to go to Handmaids.com 

Today I assembled a cute little quilt top with Janet Wecker Frisch's She Who Sews line of fabrics. It's part of the Handmaids Challenge. The first 30 people to agree to the guidelines and respond to the posting, were sent 2 random fat quarters of She Who Sews fabrics. You should have seen me sprint to respond, LOL. I LOVE this line of fabrics!


 I received a fat quarter of the peachy doll fabric and another fat quarter of the white ruler fabric.


I needed two more of the fabrics per the guidelines and went to the two local quilt shops (20 minute drive) and found the yellow ruler and the pincushion fabric. With the family on a roller coaster of activities, I didn't have time for the hour plus drive to the city to search those quilt shops. This is the negative side of sewing in a rural area. 

On a side note - Are our red pincushions tomatoes? If they are, why does it look like they have a strawberry hanging off of them? Does anybody else wonder about this stuff?

I was hugely disappointed that the local shops did not have more of the She Who Sews line. I really wanted some of the coordinating floral fabrics. I had an idea but it hinged on the florals. I am considering shopping online to buy the florals and stitch up my idea. For now though, I needed to create something for the challenge. 

As I pondered my bad luck and the beautifully detailed peach fabric I decided to make a dolly quilt. Something primitive. A dolly like a very young girl might make and enjoy, with or without her mother's help. I drew a simple pattern mimicking the doll on the fabric. Then drew a few dresses because little girls love to dress their dollies. 

I have to say this fabric is excellent. The weave is tight and firm enough to make it easy to work. The colors are deep. I really, really like it. It's fabulous quality. 


Here is my doll block. Its a simple cut and applique. I considered using black as a background so the peach would pop more but a young girl wouldn't be using black, so I stuck with a neutral tan. Even after stepping back, the doll is clear. I did a satin stitch all around the doll. 


The dresses were kept simple with the style of our young girl creator. More satin stitching. 

This is what I get for leaning over to take a picture. I promise the dress is NOT this wonky. 


The quilt is a simple 9 block design - 3 by 3 blocks. The center block is a dolly in a dress. 

Another bad angle. I was rushing pics so I could cook dinner. The story of my life, LOL. 
I used the yellow ruler as sashing and the pincushion as corner stone blocks. I love the vibrant colors. I took the flimsy picture outside on my clothesline. I had to bring clothes in anyway, LOL. The wind was blowing hard, so the quilt is leaning :)

The Oklahoma wind sure pushes my quilt top back, LOL. 

Tomorrow I will work on basting, then quilting. I want this dolly quilt done before Memorial Day weekend. I'm crossing my fingers that nothing explodes in my face. Have a great day!!

Sunday, April 6, 2014

9 Little Monkeys Jumping on the Bed


10 little monkeys jumping on the bed, one fell off and broke his head. Momma called the doctor and the doctor said, 'No more monkeys jumping on the bed!'


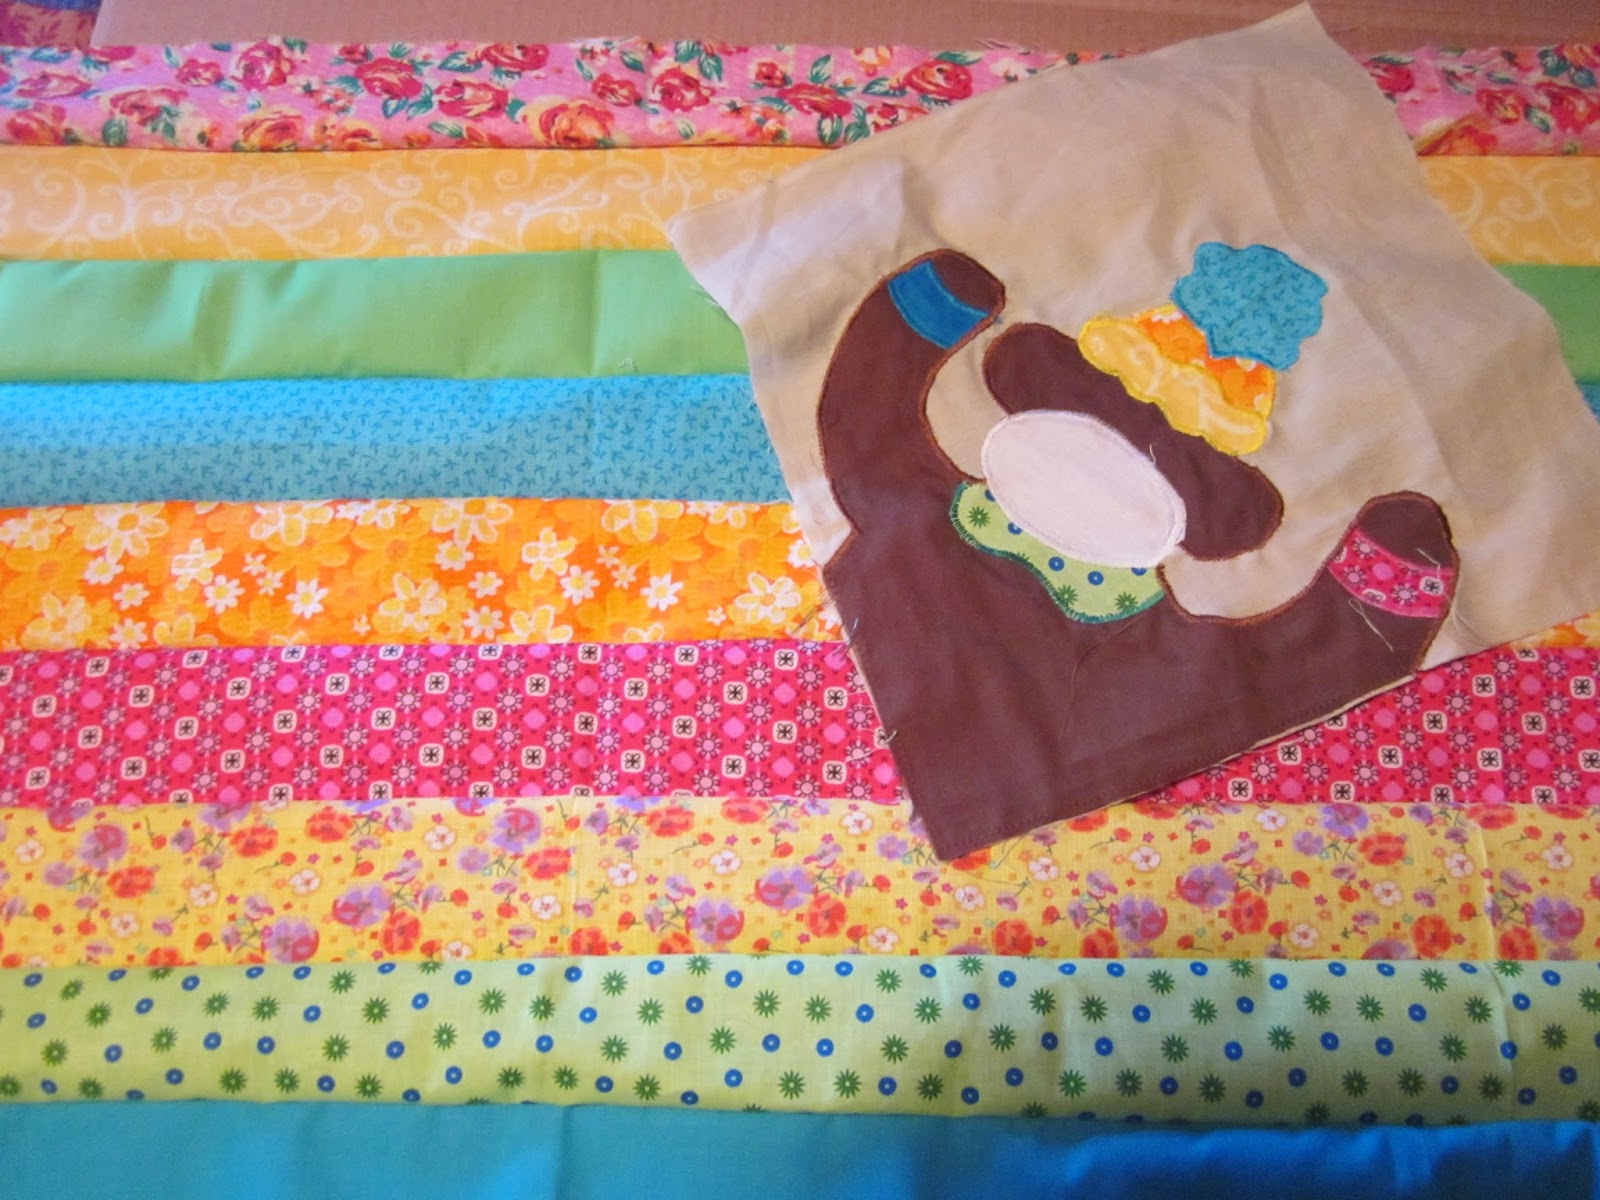
Well, I have the remaining 9 monkeys caught on the cutest quilt top ever! Cindy at Quilt Doodle Doodles needed some pattern testers for an adorable baby quilt with sock monkeys. I went bananas and shot her an email begging right away. You see, I have a weakness for sock monkeys. They are just so cute!

Original and the tissue tracing
I love her pattern. It went together quick and easy considering I had to juggle details due to living in the sticks, LOL. I was able to use scrap fabrics, a small amount of neutral yardage from my stash and bought a fat quarter of white. This is twice I have needed white and could not buy it locally. Next time I am in the city, I need to buy several yards. Remind me please.

The pieces all fit, even separated.
I received the pattern and traced around the various pieces to assemble the monkey. I usually use exam paper when I draw/trace patterns but I needed 9 of each piece. So I took my tracings and laid them on a single sheet of letter sized paper. They fit! I slipped them in a plastic sleeve and made a copy, so I would have a thicker template for my pieces.

The copy I made from the plastic sleeved pieces. 
I could not find heat and bond. I'm sure they sell it at Hancocks but they are an hour away. So I improvised .... I glued my pieces. Oh my gosh, I said it. I used Elmer's washable glue and glue my monkey pieces on the background. I have read about it but never used that method. By golly it worked great. I worked on a big piece of wax paper to protect my table. I was surprised that my blocks did not get stiff or awkward.

Monkeys say Wahoo!!
I did a satin stitch around the various pieces to secure them permanently to the background. This is my first true applique quilt and it was so much fun. I love the quick build, though I admit my hand got tired cutting all the small pieces. And the sock monkeys are so sweet!


Rather than creating my sashing from dozens of little squares, I cheated and sewed the strips together. Then cut the strips into the right size rows. Stitch those together to create the right sizes and voila I had super fast sashing.


I loved putting the top together. Adding bright colors to sock monkeys just delighted me. I smiled the whole time. Borders went on easy. I was done. Yeah!!!


I actually still need to stitch the monkeys eyes and mouths but the assembly is completed. I'm in love!
I think my sock monkey pets are happy too!

I think they are claiming this new quilt top. 
Have a great day!!!


Friday, March 7, 2014

An older lady in my life

There is another lady in my life.
In my husbands life.
She is in our bedroom!


And she is OOOOOOOOLD!!!

Her serial is G 4764606

Born in 1916. She is a Singer Red Eye aka model 66. I am still learning about her, so you will probably see and hear more as I learn.


Her cabinet is intact for the most part. Someone at some time let some red paint overspray get on the 'lid' and left side. You can see it some in the picture. Her lid is split - the veneer is lifting. If need be, I will find the right wood and build her a new lid but maybe we can just repair the veneer. It has all 7 drawers, including a drawer with some extra feet, a spare belt and some items I cannot identify, LOL. I need to get pictures and we can identify stuff together :)

For now, her wheel turns freely. Her decals are in great shape. She seems very intact considering she came from a home where she was simply decoration. She is my first vintage machine. Or is it proper to call her antique? Either way .... I'm so excited!!

Thursday, February 20, 2014

Two shirts become one

I make a mess when I cook
I want to tell you I am done with my Celtic Solstice quilt but life has me juggling. Snow, vehicle issues, snow, chaos. Lots and lots of chaos. With a house full of kids, you can't avoid chaos. Then there are the chevrons .... oh Lord help me with the chevrons. I have most of them done but not all. I have also assembled a couple dozen of the blocks that don't require evil chevrons, LOL. And I have baked banana bread. My family loves the stuff!


My daughters gentleman caller asked if I could fix a shirt for him. I said sure. Next time I will ask more questions. Oh my goodness, he doesn't really want it mended, he wants it re-created. He wants to take one of his long sleeved paintball shirts and have the under armor portion replaced with an event t-shirt. It doesn't sound hard. or does it? Turns out the shirts are 2 different sizes - the under armor is the super snug stuff, the t-shirt is a regular relaxed fit. Where is my magic wand? Hhhmmm .....

Morph two shirts into one ... hmmm
I thought about it for several hours. How to cut away a knit fabric and replace it with another knit fabric without it getting lopsided and wonky. Knits are not my strong suit. Do I put the t-shirt on the outside or the inside? I need to get the collar and sleeves lined up cohesively so the shirt will hang properly.

Basted and pinned
I decided to go t-shirt in, baste and pin it to death, snip the under armor, then fold it under and top stitch down. Too complicated? Yeah, that's what I thought, LOL. But it worked. I did not have to completely deconstruct either shirt. The camo is a top layer for the t-shirt. And slowly the event T will be revealed in a Hulk tear away maneuver. OK I snipped it quietly in my sewing corner but the Hulk was with me in spirit.


Slowly but surely, I kept basting for stability, snipping the under armor so I could top stitch the camo to the t-shirt. I am really happy with how it looks so far. Tomorrow is the really scary part - I have to attach the lower part of the under armor sleeve to the t-shirt sleeve. One is small, one is large. I need to integrate them without stretching and making the shirt wonky.


Can shirts be wonky or just quilts?

I miss straight seams.

I knew how things would go from the beginning. Stitch, rip seams, stitch again.  Snip and pray. He wants his call sign embroidered on the tshirt and thankfully my Janome Horizon does that! Yeah! But on a t-shirt? I need stabilizer. And practice.


I found some scrap stretchy material and played with stabilizers. Programmed my machine and practice stitched. Again. And again. I finally decided on a scrap of stiff fabric from a previous project. I love scraps.

Tada! I'm done. Hopefully everything will hold during one of their paintball weekends. I like how it looks. I think the tan t-shirt goes great with the camo.

What are you working on?